Complete guide
How to teach and practise 2nd grade telling time worksheets - standard theme (easy)
What this worksheet is for
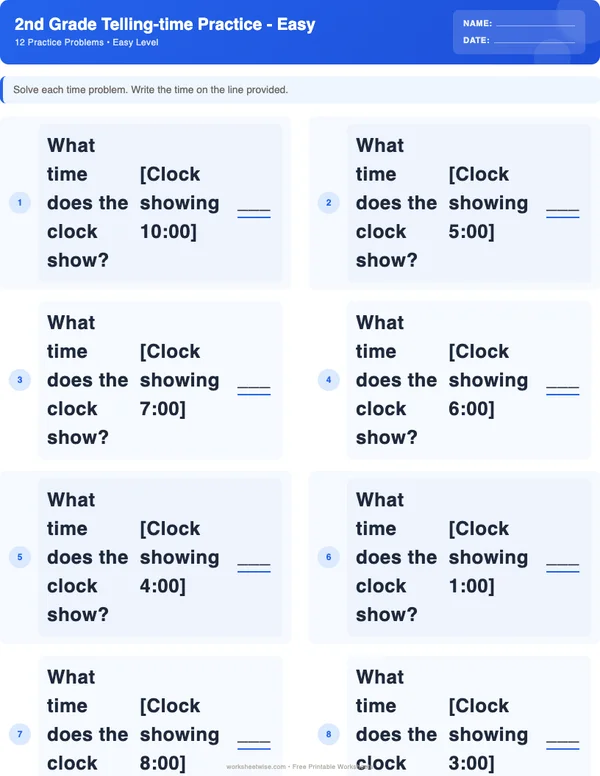
The free 2nd Grade Telling Time worksheet provides 12 easy-level problems involving analog and digital clocks, elapsed time, and time intervals. The printed instruction is: “Solve each time problem. Write the time on the line provided.” A separate printable answer key is included.
The short answer: use the first few items to confirm that the learner can identify the hour, count minutes accurately, and explain where an elapsed-time count begins. Model one comparable problem, solve several items together, and then release the remaining items for independent work. Do not treat the final score as the only evidence. Look at the learner’s method, especially when a clock is near the next hour or an interval crosses an hour.
This printable is a focused practice tool, not a complete telling-time sequence. The broader 2nd Grade Telling Time topic guide places reading clocks and working with intervals within a larger progression. Grade labels describe the intended practice level; local curricula and instructional sequences differ.
A practical lesson map
A complete session does not need to be long. Let the learner’s observed work determine how quickly you move from modeling to independence.
| Lesson phase | Suggested use | What the adult watches for |
|---|---|---|
| Preview | Scan the page and identify the kinds of time problems shown | Does the learner recognize analog clocks, digital notation, and interval language? |
| Model | Demonstrate one comparable problem without completing a printed item for the learner | Can the learner explain which information matters? |
| Guided practice | Complete two or three worksheet items together | Are errors caused by clock reading, counting, or misunderstanding the question? |
| Independent practice | Ask the learner to solve the remaining ready-level items | Can the learner maintain the same method without prompts? |
| Check and discuss | Compare work with the answer key after the attempt | Can the learner locate and correct a mismatch? |
| Retrieval | Revisit selected problems after a delay | Is the method still available without immediate rehearsal? |
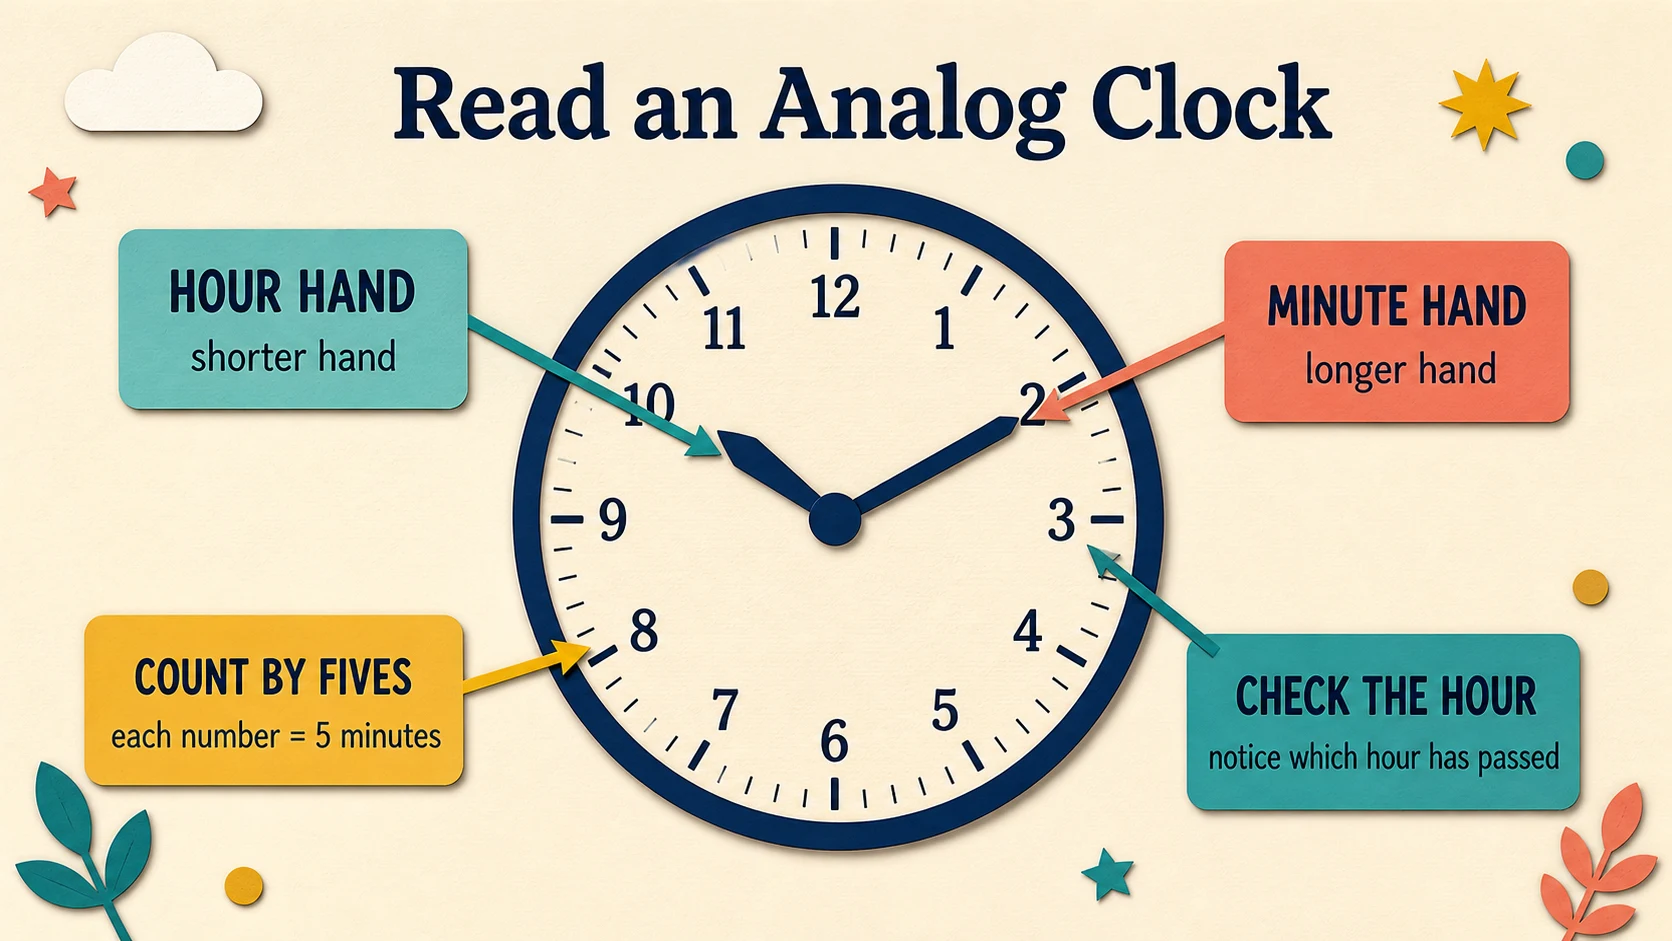
Move through the phases according to the learner’s accuracy and explanation, not merely the clock.
The IES guide for teaching mathematics to young children provides high-level support for purposeful instruction, mathematical language, and attention to what learners understand. It did not evaluate this WorksheetWise printable. Here, those principles translate into a simple routine: demonstrate the reasoning, invite the learner to explain it, and then observe whether the reasoning transfers to an unmodeled item.
Prepare the learner and the materials
Print the worksheet and keep the answer key out of sight during the initial attempt. Have a pencil and, if available, a demonstration clock with movable hands. A hand-drawn clock is also sufficient for modeling, provided the hour and minute hands are visibly different.
Before beginning, establish the meaning of the two hands:
- The short hand shows the hour or the hour the clock is moving through.
- The long hand shows the minutes.
- Each numbered position represents five minutes when counting around the clock.
- Digital time places the hour before the colon and the minutes after it.
These statements are preparation, not a demand for a memorized speech. Ask the learner to point to each hand or explain what each side of a digital time means. If that knowledge is not yet stable, pause before assigning all 12 items.
Use a two-minute readiness check
Draw or display three simple examples:
- A clock showing exactly 4:00.
- A clock showing 4:30.
- The digital time
4:25.
Ask the learner to identify the hour and minutes in each case. For 4:25, ask where the minute hand would point. Twenty-five minutes corresponds to five groups of five, so it points to the 5.
This check is not part of the worksheet score. Its purpose is to determine the amount of support needed. If all three responses are secure, begin with a brief model. If the learner confuses the hands or cannot connect clock numbers to five-minute counts, rehearse that prerequisite with a movable or drawn clock first.
Keep the language consistent
Use the same order each time:
- Read the hour information.
- Read or calculate the minutes.
- Check whether the hour has changed.
- Write the time in a clear form such as
3:25.
Consistency helps reveal the actual source of an error. If the procedure changes from problem to problem, it becomes harder to tell whether the learner misunderstood time or simply lost track of the directions.
Model the task without taking it over
Tell the learner that you will solve a similar problem aloud before they begin. Use an example that is not copied from the printable. Point to the information as you discuss it.
Suppose an analog clock has its minute hand on the 4 and its hour hand just past 7. Say:
“The short hand has passed 7 but has not reached 8, so the hour is still 7. The long hand is on 4. I count by fives from 12: 5, 10, 15, 20. The time is 7:20. I will write 7:20.”
This model contains three useful checks: the hour hand has not reached the next hour, the minute count matches the long hand’s position, and the written minutes use two digits.
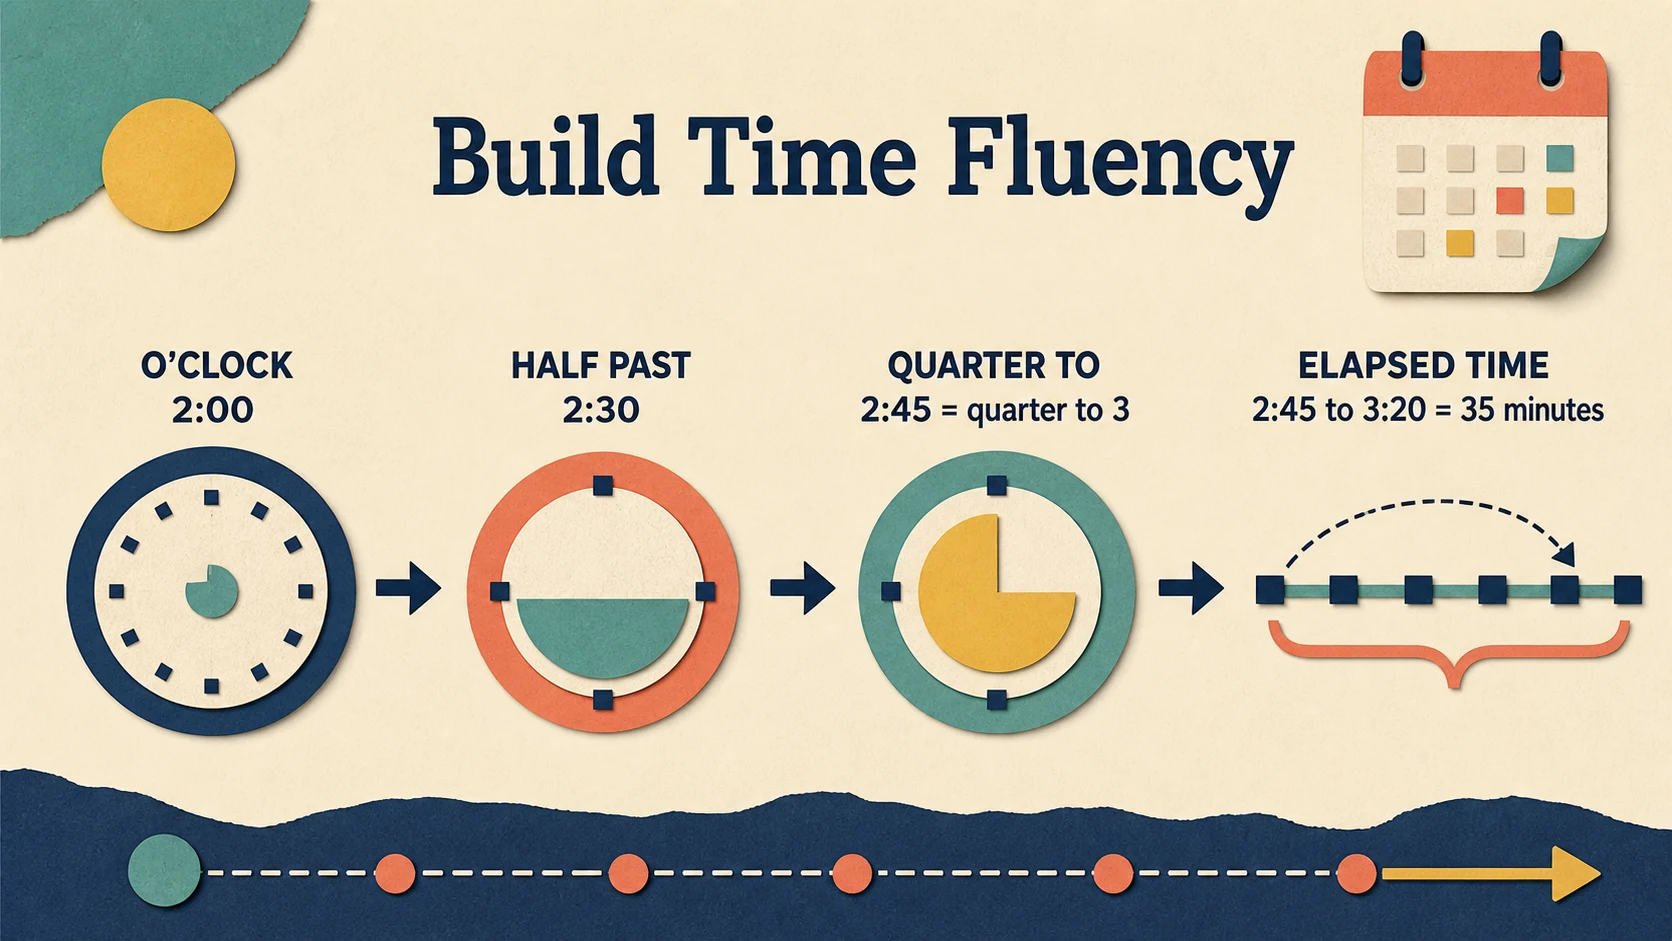
Model one complete reasoning path, then invite the learner to supply the next step.
Avoid narrating every worksheet item. One clear model is usually more informative than repeated demonstrations that leave no independent thinking for the learner. If a second model is needed, change only one feature—for example, move from reading a clock to finding an ending time.
Four fully checked examples
The following examples are comparable practice, not a transcription of the 12 printed problems. They can be used to demonstrate methods or to clarify errors while preserving the worksheet items for the learner.
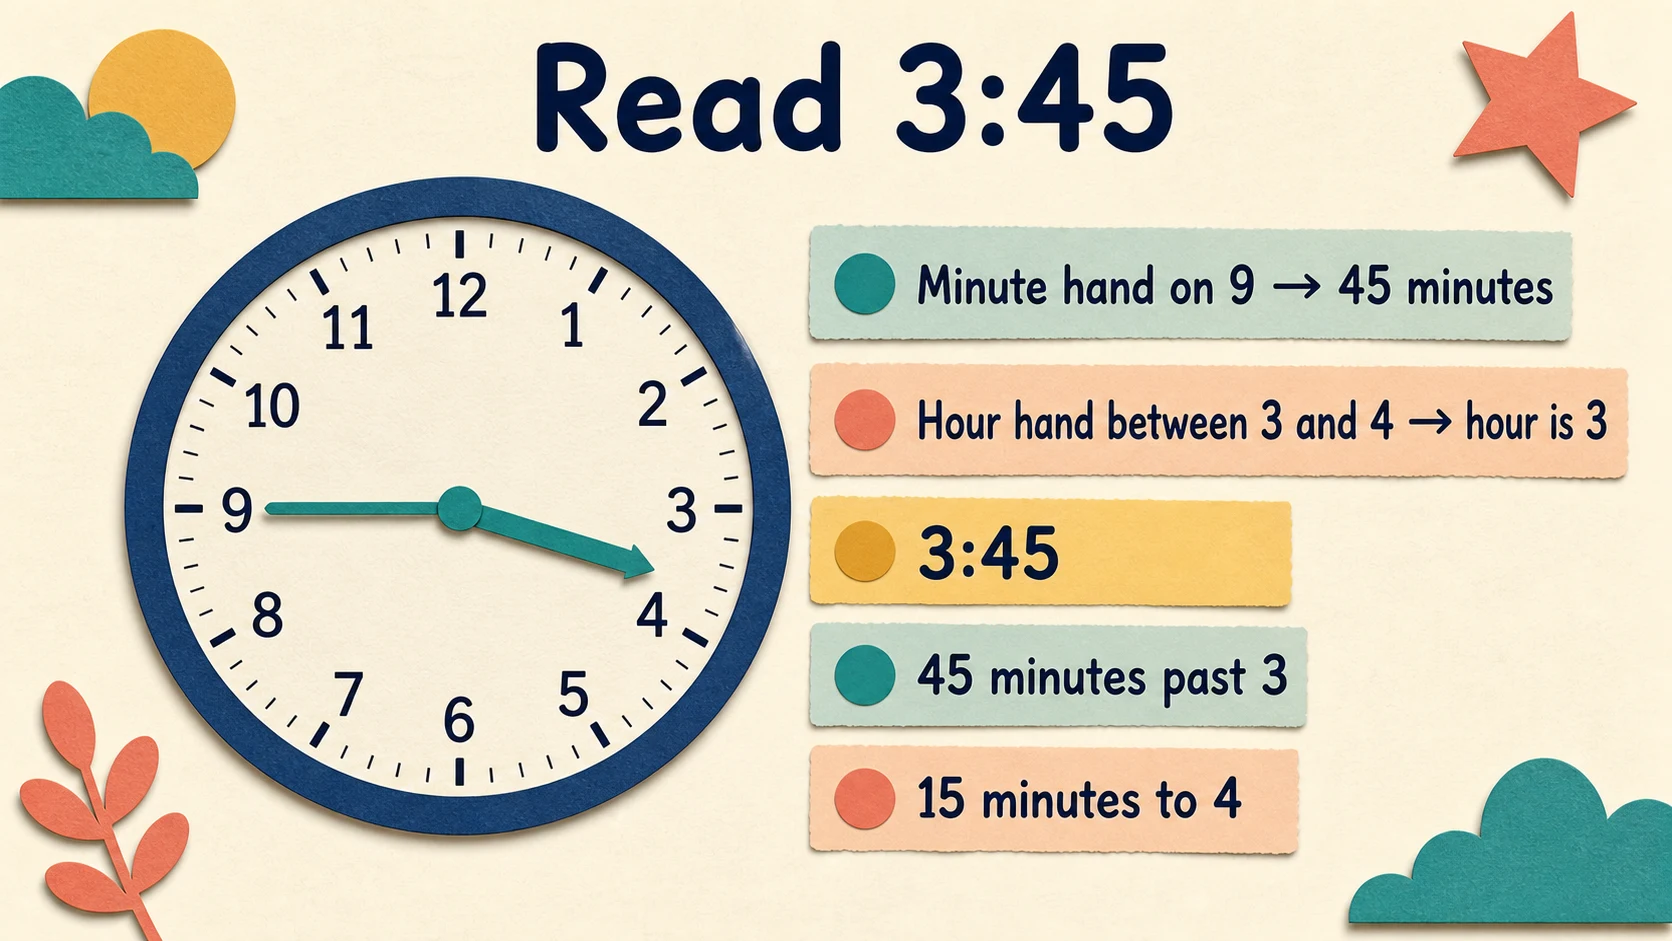
Check the hour, determine the minutes, and verify that the final notation matches both.
Example 1: Read an analog clock
A clock’s minute hand points to the 7. Its hour hand is between 2 and 3.
Count the minute positions by fives:
- 1 means 5 minutes.
- 2 means 10 minutes.
- 3 means 15 minutes.
- 4 means 20 minutes.
- 5 means 25 minutes.
- 6 means 30 minutes.
- 7 means 35 minutes.
The minute value is 35. Because the hour hand has passed 2 but has not reached 3, the hour is 2.
Answer: 2:35
Check: 35 minutes is more than half an hour, so the hour hand should be more than halfway from 2 toward 3. That matches the description.
Example 2: Place hands for a digital time
Represent 6:45 on an analog clock.
Forty-five minutes is nine groups of five:
5, 10, 15, 20, 25, 30, 35, 40, 45
Therefore, the minute hand points to the 9. The hour hand is between 6 and 7. Because 45 minutes of the hour have passed, it should be closer to 7 than to 6, but it has not yet reached 7.
Answer: minute hand on 9; hour hand between 6 and 7
Check: if the hour hand were exactly on 7, the display would incorrectly suggest 7:45 or 7:00, depending on the minute hand. The hour remains 6 until the clock reaches 7:00.
Example 3: Find an ending time without crossing the hour
A reading period begins at 9:10 and lasts 20 minutes.
Count forward in useful jumps:
9:10 + 10 minutes = 9:209:20 + 10 minutes = 9:30
The total added time is 10 + 10 = 20 minutes.
Answer: 9:30
Check by subtraction in plain language: from 9:10 to 9:30, 20 minutes pass. The beginning and ending times remain within the 9 o’clock hour.
Example 4: Find an ending time across an hour
An activity begins at 11:50 and lasts 25 minutes.
First count to the next hour:
- From
11:50to12:00is 10 minutes. - Of the 25 minutes,
25 − 10 = 15minutes remain. - Fifteen minutes after
12:00is12:15.
Answer: 12:15
Check the interval in two parts: 10 minutes + 15 minutes = 25 minutes. The hour changes because the count passes 12:00.
The open-jump method makes the hour boundary visible. The catalogue’s topic guidance recommends open number lines for elapsed time instead of treating time as ordinary base-ten column subtraction. A simple line labeled 11:50 → 12:00 → 12:15 is enough.
Run guided practice, then release responsibility
Begin the worksheet by asking the learner to study the first item without writing. Ask, “What kind of problem is this?” A useful response might identify it as reading a clock, matching a digital time, finding an ending time, or determining an interval.
During the first guided item
Limit prompts to the next necessary decision:
- “Which hand gives the hour?”
- “Where does the minute count begin?”
- “How many minutes does each clock number represent?”
- “Will this count pass the next hour?”
- “How could you check that?”
Wait for the learner’s response before adding another prompt. If the learner says the minute hand is on 8, ask for the corresponding minute value rather than supplying 40. If the learner begins an elapsed-time count at the wrong place, ask them to point to the starting time.
During the second guided item
Reduce the support. Ask the learner to explain the full method before calculating. If the explanation is sound, allow the work to continue. If it is incomplete, return to one focused prompt.
A learner who gives a correct answer with unclear reasoning may have guessed or used an unstable method. Ask for one check, such as counting the minute positions again or splitting an elapsed interval at the hour.
During independent work
Define independence clearly: the learner may use the clock face, make tally marks, write jumps, or draw a number line, but the adult will not provide answers. Those written supports are evidence of reasoning, not signs that the work is invalid.
Observe quietly for several items. Record brief notes if useful:
- reads hands in the correct order;
- counts by fives accurately;
- changes the hour at the correct point;
- writes minutes with two digits;
- uses interval jumps consistently.
If the learner becomes stuck on one item, mark it and move to another. One difficult representation should not prevent the learner from showing what they can do elsewhere on the page.
Adapt support without changing the skill
Differentiation should make the same telling-time task more accessible. It should not replace the target with an unrelated easier activity.
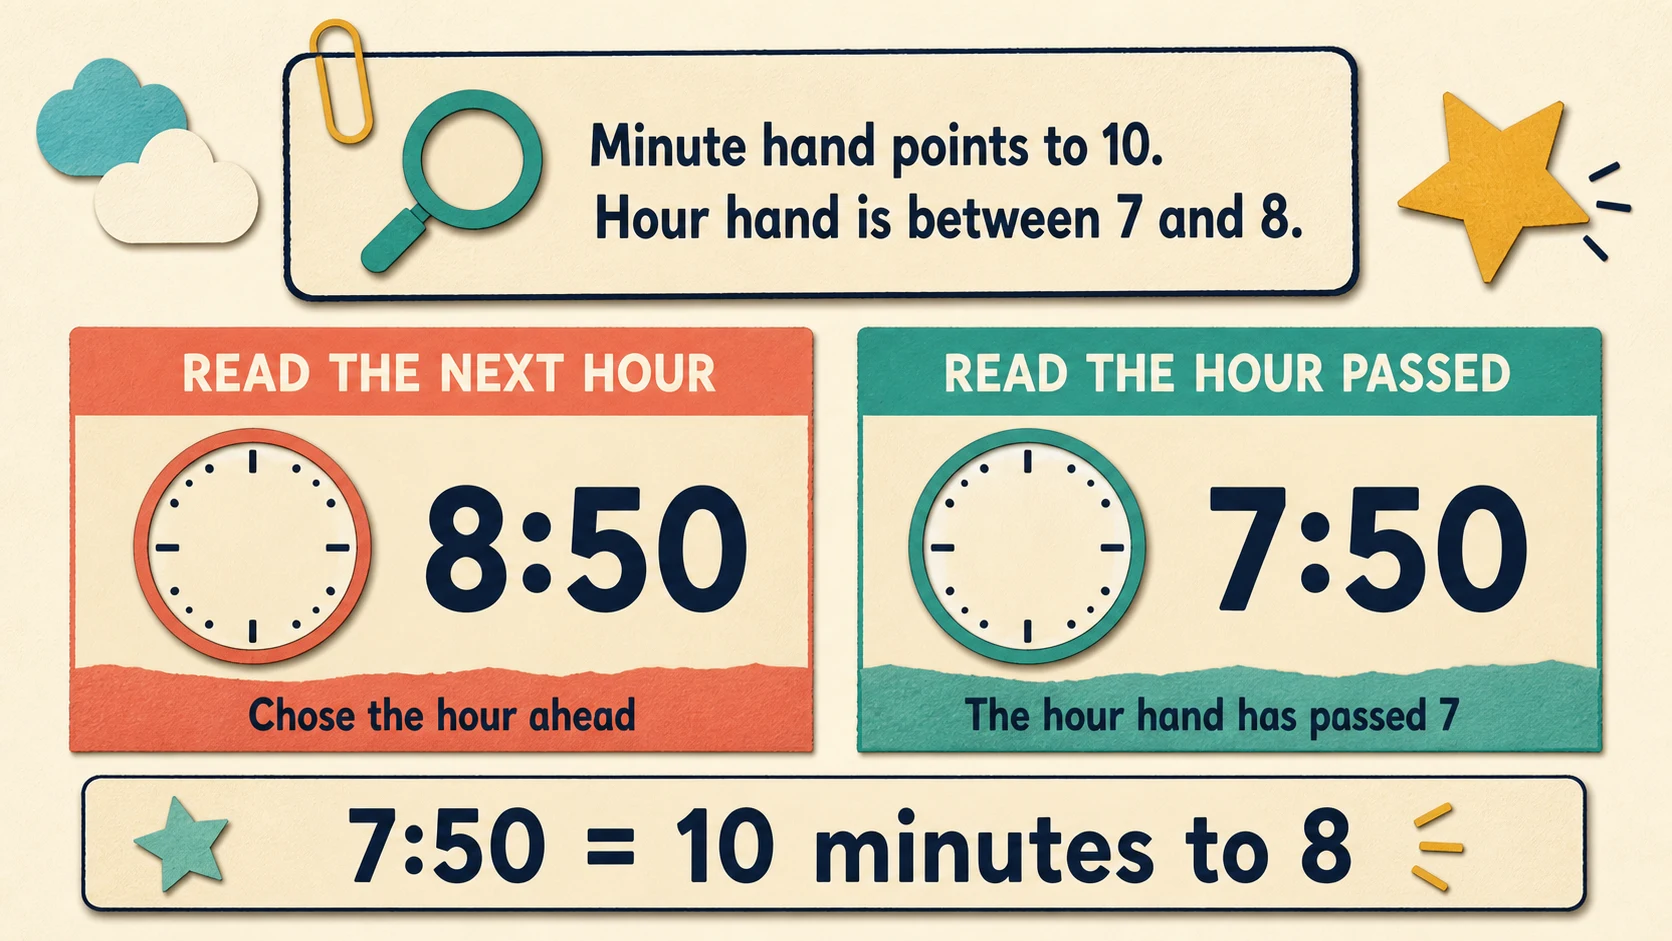
Adjust the amount of visual, verbal, or organizational support while preserving the time problem.
Add visual support
For a learner who understands hours but loses track of minute values, lightly annotate a separate demonstration clock with 5, 10, 15, 20 and so on. Keep the printed problem unchanged. The learner still reads the hand position and writes the time; the annotation reduces the skip-counting load.
For elapsed time, provide an open line with the starting time already labeled. The learner chooses the jumps and determines the ending time. Do not prefill every jump, because selecting the jumps is part of the reasoning.
Reduce the visible workload
Cover part of the page so that only one row or one problem is visible. The learner still completes the same 12 items, but in smaller groups. This can make it easier to attend to the current clock or interval.
A practical sequence is three items, a brief check, three more, and then a decision about continuing. The learner’s observed work—not a universal timetable—should determine whether the page is completed in one sitting.
Increase verbal structure
Offer a reusable sentence frame:
“The hour is __ because __. The minutes are __ because __. Therefore, the time is __.”
For an interval:
“I start at __. I jump __ minutes to __. Then I jump __ minutes to __. The total is __ minutes.”
Remove the frame when the learner begins explaining independently. The mathematical demand remains reading or calculating time.
The IES practice guide on assisting students who struggle with mathematics offers high-level guidance about systematic instruction, clear mathematical language, and visual representations. It does not provide a judgment about this worksheet. Here, it supports the instructional choice to make a time relationship visible and to fade assistance as the learner becomes more accurate.
Interpret errors before correcting them
A wrong answer does not identify its own cause. Compare the written result with the learner’s marks and explanation.
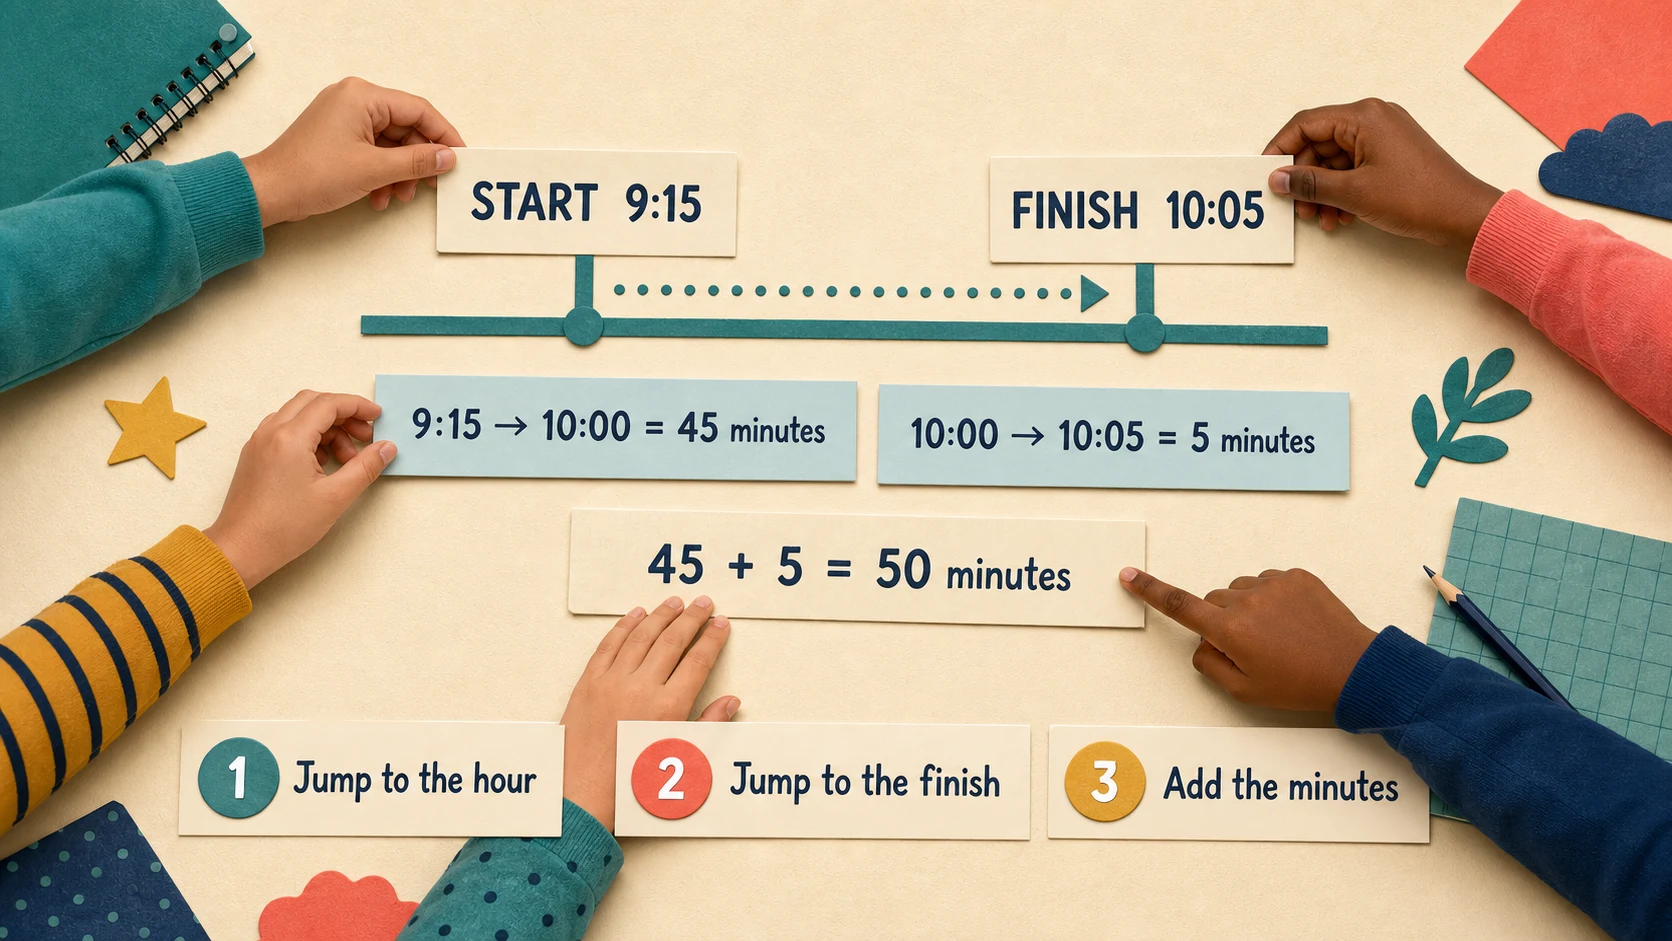
Identify whether the mismatch comes from the hour, minutes, interval count, or written notation.
Confusing the hour and minute hands
If a clock shows a long hand on 3 and a short hand near 8, a learner may write 3:40 or another reversed reading. Ask the learner to identify the hand by length before naming any numbers. Then reconnect the long hand’s position with minutes.
Correction: “Point to the long hand. What minute value does the 3 represent?”
Naming the next hour too early
A clock showing 3:45 has an hour hand close to 4. A learner may write 4:45. The visual clue is understandable, but the hour has not yet reached 4.
Correction: trace the hour hand’s movement from 3 toward 4 and say, “It is still three-something until the hour hand reaches 4.” Then verify that 45 minutes explains why the hand is close to the next hour.
Reading clock numbers as minute values
A learner may see the minute hand on 8 and write :08. Ask them to count by fives to that position: 5, 10, 15, 20, 25, 30, 35, 40.
Correction: connect the eight numbered spaces with eight groups of five. The correct minute value is 40.
Counting the starting time as elapsed time
From 2:10, a learner finding 15 minutes later might count 2:10, 2:15, 2:20 and report 2:20. The starting point has been counted as the first five-minute jump.
Correction: place a finger on 2:10 and say, “This is where no time has passed yet.” Then make three five-minute moves: 2:15, 2:20, 2:25.
Treating minutes like base-ten ones
A learner may reason that 50 minutes plus 20 minutes ends in “70 minutes” without converting through the next hour. Use the hour boundary:
- 10 minutes changes
7:50to8:00. - 10 more minutes changes
8:00to8:10.
Correction: write 7:50 → 8:00 → 8:10 and verify that the two jumps total 20 minutes.
Include boundary cases deliberately
Boundary cases reveal whether the learner understands the clock system rather than relying on a visual shortcut.
Use a few oral examples after the worksheet:
- At
5:00, the minute hand points to 12 and the hour hand points to 5. - At
5:55, the hour hand is very close to 6, but the hour remains 5. - Ten minutes after
8:55is9:05, not8:65. - Fifteen minutes before
3:05is2:50. - An interval from
1:50to2:10lasts 20 minutes: 10 minutes to 2:00 and 10 minutes after it.
These examples should be introduced only if they clarify an observed need. A learner who is still establishing five-minute counts does not need a large collection of crossing-hour examples at once.
The Common Core mathematics standards describe grade-level expectations that include telling and writing time to the nearest five minutes in Grade 2, including the use of a.m. and p.m. That source provides broad standards context; it does not certify this worksheet or establish comprehensive alignment. The catalogue states that this printable also includes elapsed time and time-interval practice, so adults should inspect each item and judge its fit with their local sequence.
Check the answer key responsibly
Use the answer key after the learner has made a genuine attempt. Its purpose is efficient comparison, not replacing observation or explanation.
A reliable checking routine is:
- Compare one item at a time.
- Mark matches without interrupting the learner’s concentration.
- Circle or note mismatches rather than immediately writing the correct answer.
- Ask the learner to reread the problem and explain the original method.
- Decide whether the error concerns the hour, minutes, interval, or notation.
- Let the learner revise in a different color if that makes the change visible.
- Confirm the revision against the key.
For an analog-clock response, inspect the printed clock yourself. An answer can match the key while the learner’s reasoning remains uncertain. Conversely, a learner might understand the time but write 6:5 instead of 6:05. That is a notation issue, not evidence that the entire concept is missing.
For an elapsed-time item, reconstruct the interval. If the key says an activity ending from 10:35 after 20 minutes finishes at 10:55, verify it by two ten-minute jumps. If an answer crosses an hour, split the interval at :00. Responsible key use includes checking the mathematical relationship, especially if a print mark or hand position is difficult to see.
Do not convert every correction into a new score. A brief error record is more useful:
- Initial result: what the learner wrote.
- Error type: hour, minute, interval, or notation.
- Support used: prompt, clock model, or number line.
- Revision: whether the learner corrected it independently.
Decide what to do next from the work
A single percentage cannot show which part of telling time is secure. Group the evidence by skill.
If the learner reads analog and digital clocks accurately but misses elapsed-time items, keep clock-reading practice brief and teach interval jumps directly. If minute counts are unstable, revisit counting by fives around a clock before adding more intervals. If most answers are accurate but notation is inconsistent, practice writing times such as 4:05, 4:10, and 4:50 without reteaching the whole topic.
A reasonable decision framework is:
| Observed work | Productive next move |
|---|---|
| Accurate answers with clear explanations | Move to a few varied or less-supported telling-time problems |
| Accurate answers only after repeated prompting | Repeat a short set with prompts gradually removed |
| Consistent minute-counting errors | Rehearse five-minute positions on a clock, then retry selected items |
| Correct clock reading but incorrect intervals | Use open number-line jumps, including one hour-boundary example |
| Mixed errors across most items | Return to one representation at a time and postpone the full page |
| One isolated mistake | Correct it, explain it, and confirm with one comparable example |
The 2nd Grade math hub can help place this work alongside other mathematics practice. For a larger set devoted to this topic, the catalogue also lists an 18-worksheet 2nd Grade Telling Time pack. More pages are useful only when they target the pattern actually observed.
Schedule retrieval without overloading the learner
Retrieval means asking the learner to use the method again after some time has passed, without first repeating the full lesson. The exact schedule should reflect local routines and the learner’s responses.
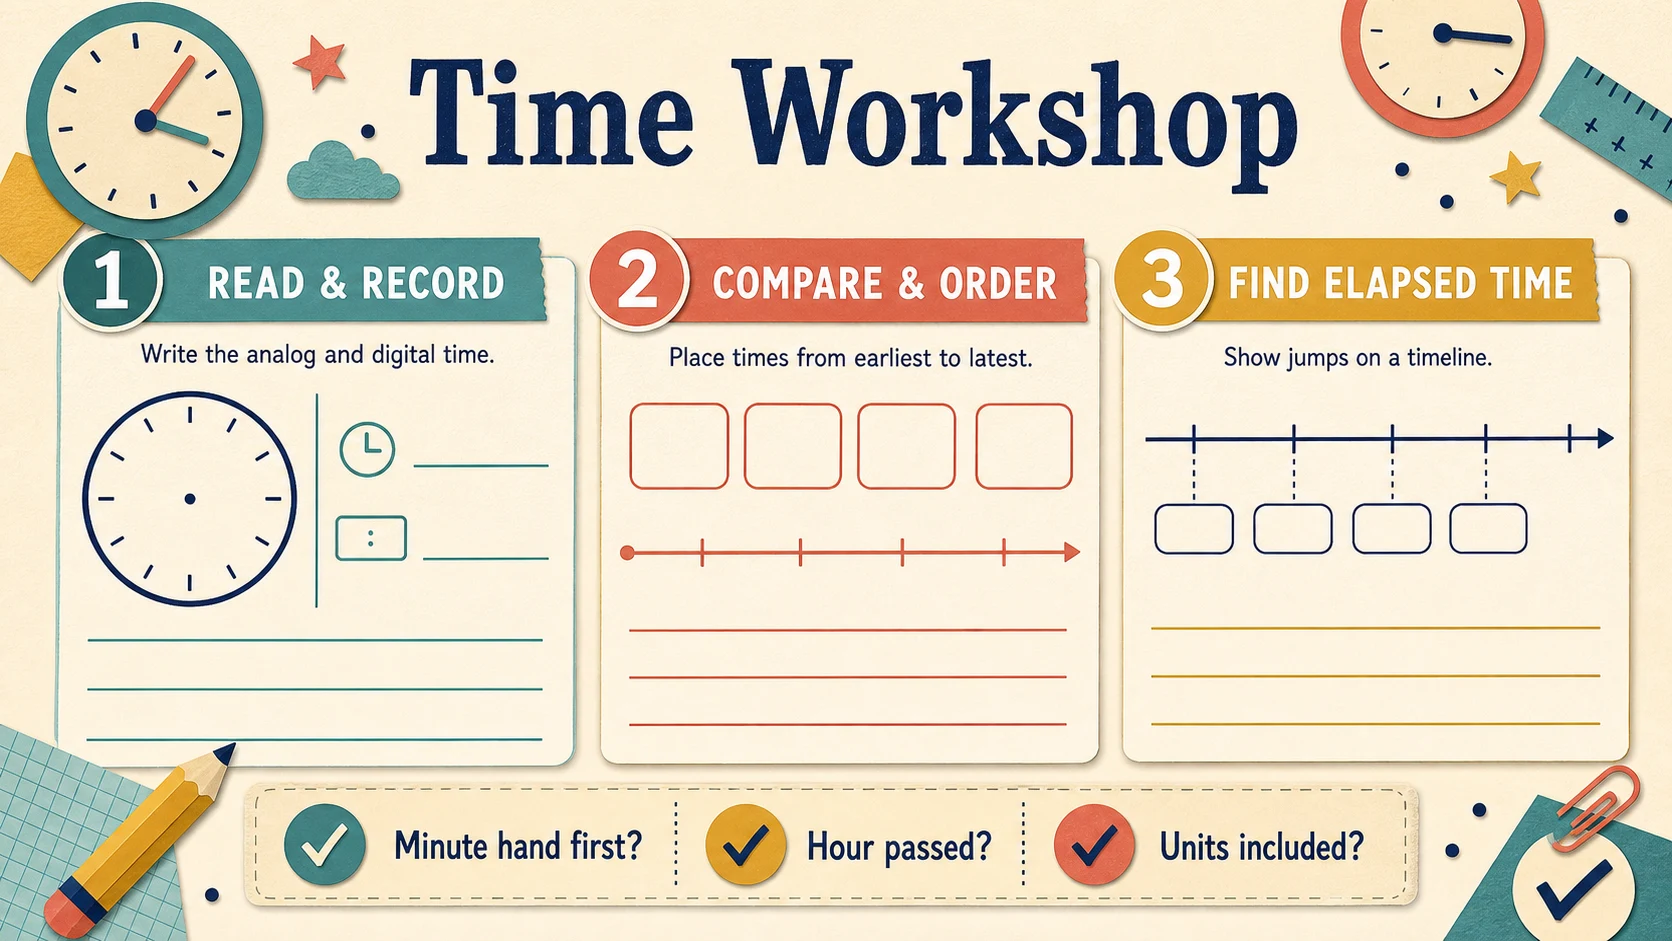
Revisit a small, varied selection and adjust the spacing according to what the learner retains.
A practical, adjustable plan is:
- Later the same session: Rework one corrected item without looking at the earlier solution.
- At the next suitable math session: Solve one clock-reading example and one interval example.
- Several days later: Mix a telling-time problem with other familiar math work.
- The following week, if appropriate: Try two or three new examples without the previous sentence frame or annotated clock.
- After a longer gap: Ask for one explanation, not just an answer, to confirm that the method remains available.
This is an instructional suggestion, not a universal timetable. Shorten the gap if the learner cannot retrieve the method. Lengthen it when responses are accurate and explanations are clear. If errors reappear, provide a brief reminder and another opportunity rather than assigning the entire worksheet again automatically.
Limitations and an honest next step
This worksheet contains 12 easy-level exercises. It can provide useful evidence about reading clocks, writing times, and handling the included elapsed-time or interval tasks, but 12 items cannot represent every telling-time situation. The printable alone cannot establish broad mastery, determine a complete curriculum sequence, or show how the learner will use time in every context.
It also should not be treated as proof of comprehensive standards alignment. Grade labels describe intended practice level, and local sequences differ. Some learners may meet a.m. and p.m. before elapsed time; others may encounter interval work through schedules or number lines. Use the actual printed items, the learner’s explanations, and local instructional goals to decide what belongs next.
For the immediate next action, download the free worksheet and answer key, model one comparable problem, and note the first error pattern rather than only the total correct. After checking the page, use the Telling Time topic guide to choose the next skill, or create a small follow-up set with the free worksheet generators that targets the specific representation the learner needs to retrieve.
Put it into practice
Use the guide with a real printable
Move from explanation to a short, observable practice task. Check the first item together, then adjust the next session from the learner's actual work.
See the 18-worksheet pack