Complete guide
How to teach and practise 1st grade telling time worksheets - standard theme (easy)
How to use this 12-item telling-time worksheet
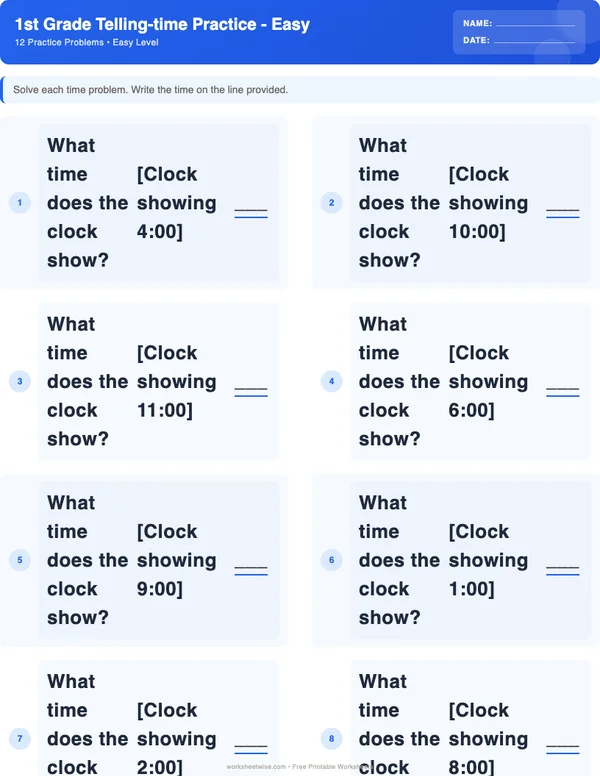
The free 1st Grade Telling Time worksheet gives a learner 12 easy-level problems involving analog and digital clocks, telling time, elapsed time, and time intervals. The printed direction is: “Solve each time problem. Write the time on the line provided.” A separate answer key is included.
The most effective way to use this printable is to inspect its problem types first, model one similar problem away from the page, complete a few worksheet items together, and then release the learner to work independently. Check how the learner determines each answer, not merely whether the written answer matches the key. Errors should guide the next lesson and the amount of support provided.
Grade labels describe the intended practice level, not a guarantee that every learner has already received the same instruction. Local curricula and teaching sequences differ. If this worksheet introduces an unfamiliar increment or elapsed-time format, teach that idea before expecting independent work.
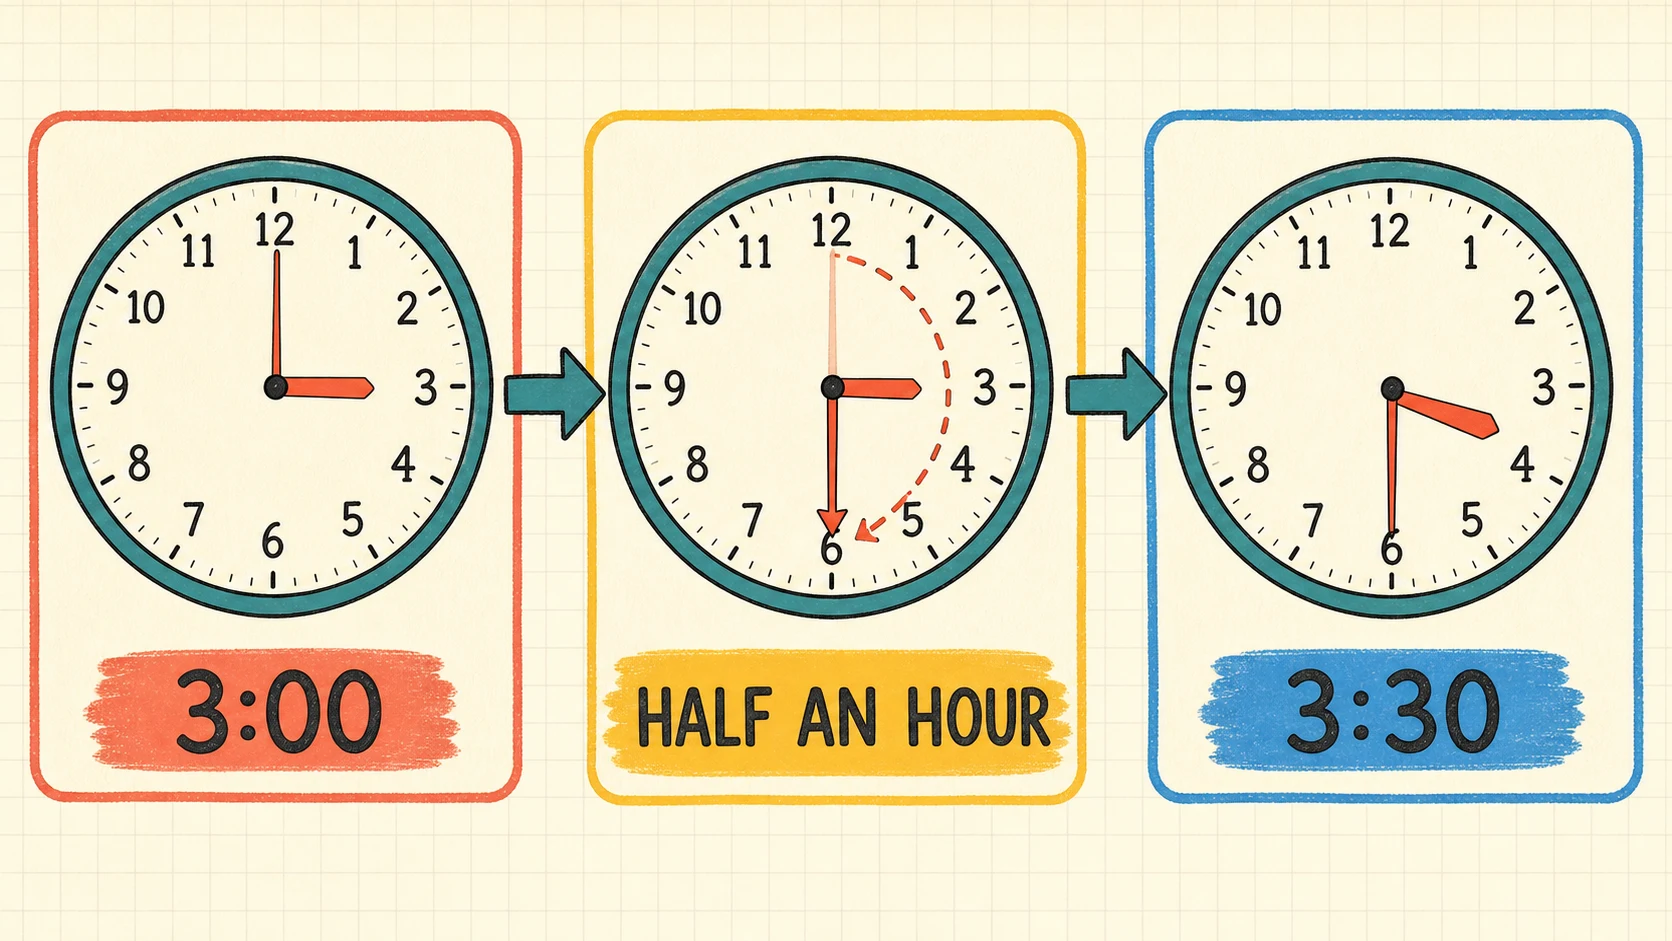
Preview, model, guide, release, check, and revisit.
A practical lesson map
A first session can be brief or extended according to the learner’s observed work. Do not require a universal completion time. Some learners will read the clocks fluently but need help writing digital notation. Others may recognize whole-hour times yet hesitate over half-hours or intervals.
| Lesson phase | Adult action | Learner action | Decision point |
|---|---|---|---|
| Preview | Scan all 12 items and identify the representations and increments used. | Look over the page without solving it. | Are any item formats unfamiliar? |
| Readiness check | Show two or three times on a separate clock or sketch. | Name the hour and minute information. | Can the learner distinguish the hands and read the hour first? |
| Model | Solve a similar problem aloud without copying a worksheet item. | Watch, listen, and explain what each hand or number shows. | Does the explanation make sense to the learner? |
| Guided practice | Complete selected worksheet items together. | State a strategy before writing each answer. | Is support becoming less necessary? |
| Independent practice | Assign the remaining appropriate items. | Solve and write answers independently. | Is the learner accurate without prompting? |
| Review | Compare work with the answer key and revisit reasoning. | Correct errors and explain the correction. | Was the error conceptual, procedural, or notational? |
| Retrieval | Reuse a few similar prompts after a delay. | Solve without looking at prior work. | Has the learning remained available? |
Before starting, have a pencil and, if available, a demonstration clock with movable hands. A hand-drawn clock is also sufficient for modeling whole- and half-hour examples. Keep the worksheet visible, but model on separate paper so that the learner still has to think through the printed items.
For a broader sequence—from reading clocks to later work with finer increments and elapsed time—use the telling-time topic guide. This lesson should concentrate on what the 12-item printable actually asks rather than attempting to reproduce the entire topic progression.
Preview the page before teaching
The catalogue identifies four skills in this worksheet: telling time, reading clocks, elapsed time, and time intervals. It also says that learners encounter analog and digital clocks and various increments. It does not specify how many items use each format or which increments appear in particular problems. Therefore, the adult should examine the downloaded page instead of assuming that every question is an hour or half-hour clock.
Sort the visible tasks
Look across the page and informally classify each item:
- Does it ask the learner to read an analog clock?
- Does it present a digital time?
- Does it require finding a later or earlier time?
- Does it involve an interval between two times?
- What form should the written answer take?
This preview prevents a format change from being mistaken for a learning failure. A learner may know that a clock shows half past six but not yet know that the expected written form is 6:30. That response reveals a notation gap, not necessarily a misunderstanding of the clock.
Check essential language
Confirm that the learner understands the words and symbols used on the page. Useful terms may include hour hand, minute hand, o’clock, half past, later, earlier, and minutes. Introduce only the terms needed for the visible problems.
Ask the learner to point to the short hand and long hand on a sample clock. Then ask what the colon separates in a digital time. For 5:30, the number before the colon names the hour, while 30 records the minutes after that hour.
If the learner cannot yet identify the hands, pause before assigning the printable independently. That is a readiness issue, not a reason to change the mathematical target.
Establish a reliable clock-reading routine
A consistent routine reduces guessing:
- Read the hour hand.
- Decide which hour the hand has reached but not passed.
- Read the minute hand or the displayed minute value.
- Say the complete time.
- Write it in the requested form.
- Check the answer against the representation.
The catalogue’s topic guidance recommends reading the hour hand first and introducing the minute hand through the o’clock and half-past positions. It also notes a common difficulty when the minute hand is past 30: the hour hand may sit closer to the next numeral even though that next hour has not begun.
Model the thinking, not just the answer
Suppose a practice clock has the minute hand at 12 and the hour hand at 3. An effective model sounds like this:
“The short hour hand points to 3, so the hour is three. The long minute hand points to 12, which means zero minutes after the hour. The time is 3:00.”
This narration connects the visual evidence to the notation. Merely saying “The answer is 3:00” gives the learner nothing reusable.
When the minute hand points to 6, explain that 30 minutes of the current hour have passed. On a realistic analog clock, the hour hand should be between two hour numerals at that point. It should not remain directly on the earlier numeral.
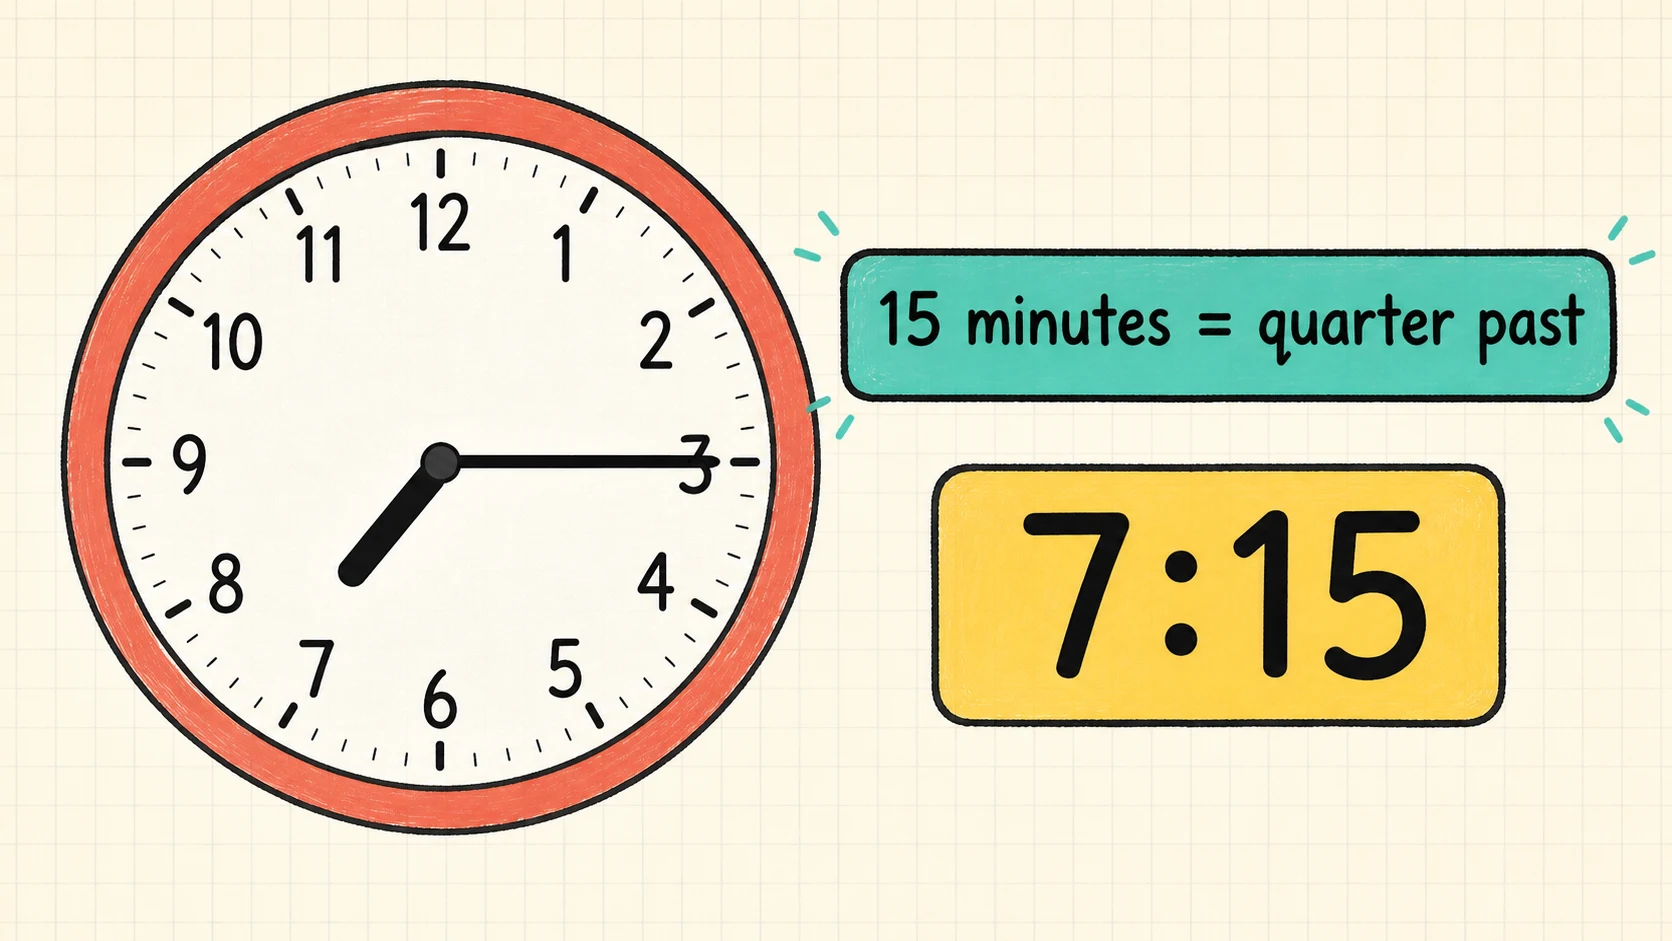
Read the hour information first, then determine the minutes and verify the notation.
Four fully checked examples
The following examples are not claims about the exact questions printed on the worksheet. They are verified models for the kinds of foundational time reasoning named in the catalogue. Select only examples that prepare the learner for formats actually visible on the page.
Example 1: Read a whole-hour analog clock
A clock has its short hand on 4 and its long hand on 12.
- The hour hand identifies 4.
- A minute hand on 12 represents zero minutes after the hour.
- Written time:
4:00.
Check: At 4:00, no minutes of the four o’clock hour have passed. Both the hand positions and the digital notation agree.
Example 2: Read a half-hour analog clock
A clock has its long hand on 6. Its short hand is halfway between 7 and 8.
- The hour hand has passed 7 but has not reached 8.
- The minute hand at 6 represents 30 minutes after the hour.
- Written time:
7:30.
Check: Thirty minutes is half of a 60-minute hour. The hour hand’s halfway position is consistent with half past seven.
Example 3: Find a later time
A lesson begins at 2:00 and lasts 1 hour.
- Start at
2:00. - Move forward one complete hour.
- The minutes remain
00. - Ending time:
3:00.
Check: Counting from 2 o’clock to 3 o’clock gives one hour, so 3:00 is correct.
Example 4: Cross into the next hour
A break begins at 9:30 and lasts 30 minutes.
- Start at
9:30. - Moving forward 30 minutes completes the remaining half of the nine o’clock hour.
- The next hour begins at
10:00. - Ending time:
10:00.
Check: From 9:30 to 10:00 is 30 minutes. The hour changes, and the minute value returns to 00.
These examples should be demonstrated one at a time. After each model, ask the learner to restate the reasoning: “Which hour has started?” “How many minutes have passed?” or “Where did the time land after the jump?”
Move from guided to independent practice
Begin with selected items
Choose one or two worksheet problems that closely resemble the model. Ask the learner to point before writing:
- Point to or name the hour information.
- Point to or name the minute information.
- Say the complete time.
- Write the answer.
- Compare the written answer with the original clock or interval.
Use prompts only as needed. A useful prompt directs attention without providing the result: “Which hour has the short hand already passed?” A less useful prompt embeds the answer: “Isn’t that seven?”
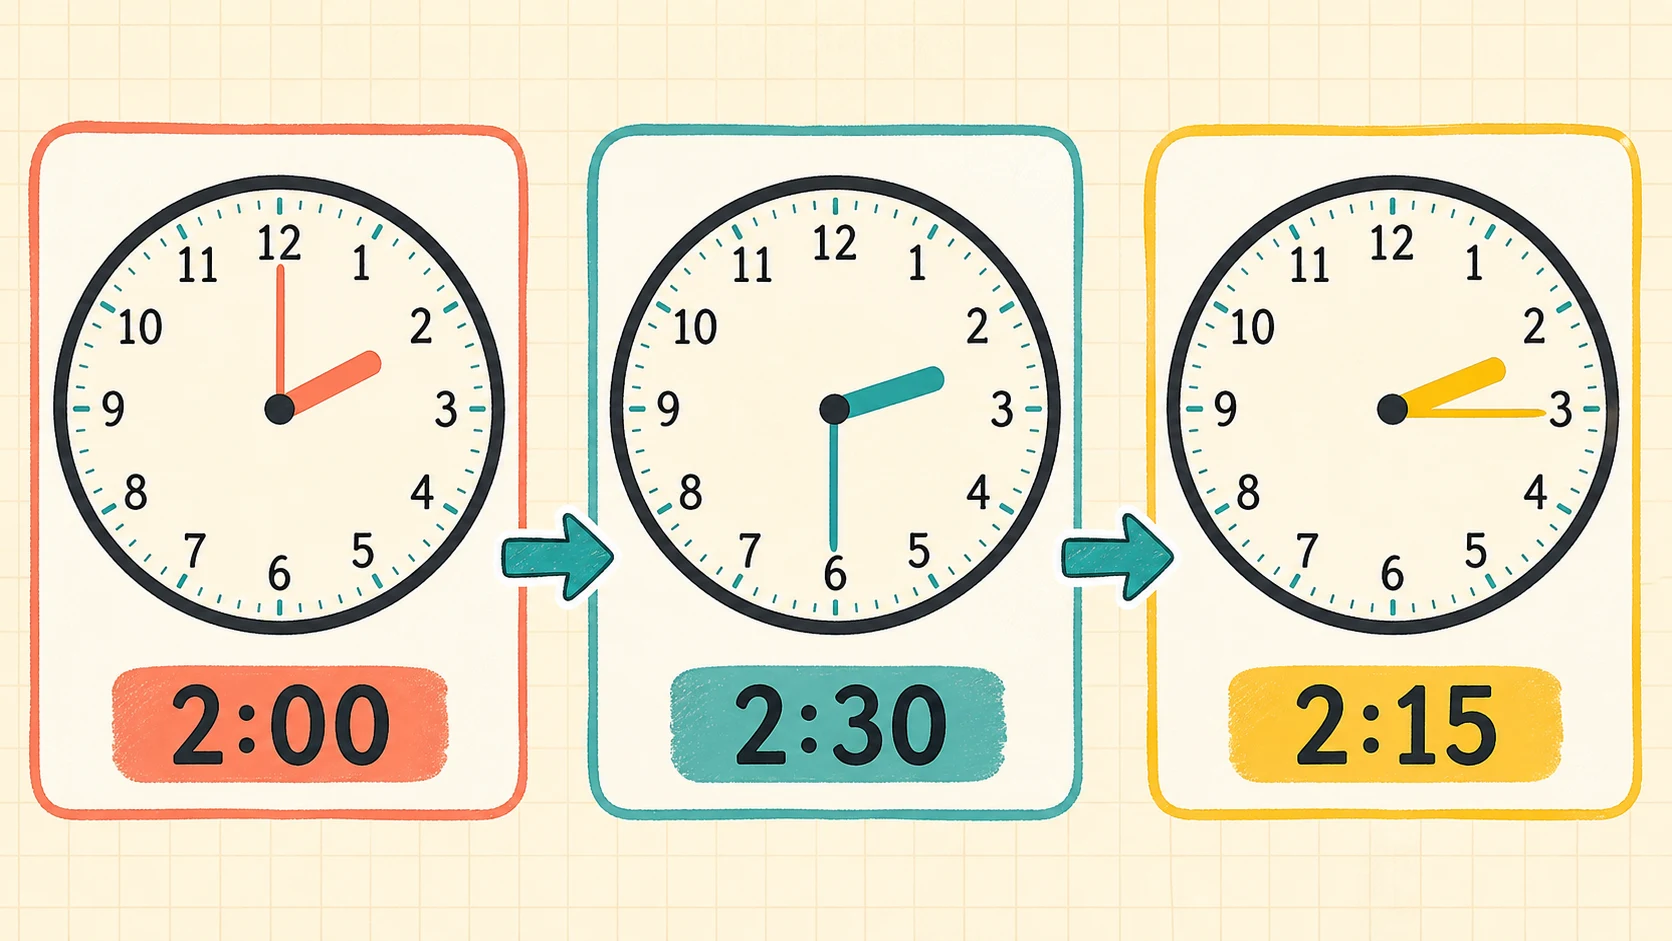
Use a similar example first, then remove prompts as the learner demonstrates a stable method.
Fade assistance deliberately
Support can be reduced in small steps:
- The adult models every decision.
- The adult asks questions while the learner makes each decision.
- The learner narrates the routine without adult questions.
- The learner solves silently and explains afterward.
- The learner completes a short set independently.
Release the learner when the method is visible, not after an arbitrary number of examples. If the learner answers correctly but cannot explain how, give another guided item before moving on. A correct guess does not yet demonstrate a dependable strategy.
During independent work, avoid correcting each answer immediately. Let the learner complete a manageable group, perhaps two or three items, and then pause for a process check. This preserves independence while preventing the same misunderstanding from spreading across all 12 items.
The IES guide on teaching mathematics to young children provides broader evidence-based instructional framing for early mathematics. It did not evaluate WorksheetWise or this particular printable. Here, its role is contextual: adults can combine clear mathematical language, representations, and purposeful practice with direct observation of the learner’s work.
Adapt support without changing the skill
Adaptation should make the same time problem more accessible. It should not quietly replace telling time with copying an adult’s answer.
When the clock face is visually demanding
Cover nearby items with a blank sheet so only one problem is visible. Enlarge the page if the clock hands or numerals are difficult to distinguish. The learner should still interpret the same clock and produce the same answer.
You can also ask the learner to trace each hand in the air: first the hour hand, then the minute hand. This separates visual attention without removing the time-reading demand.
When the learner confuses the hands
Use a demonstration clock and label the hands temporarily. Ask the learner to identify the hour before discussing minutes. Then transfer immediately back to the printed item.
Do not teach “the shorter hand always points exactly at the hour number.” At half past, it should have moved toward the next hour. Instead, ask which numeral it has passed and which one it has not yet reached.
When elapsed time causes difficulty
Represent the interval as forward jumps. For example:
6:00 → 7:00
The jump is one hour. For a half-hour boundary:
11:30 → 12:00
The jump is 30 minutes.
Keep the start time, interval, and direction unchanged. The number line or movable clock is temporary support for the same calculation.
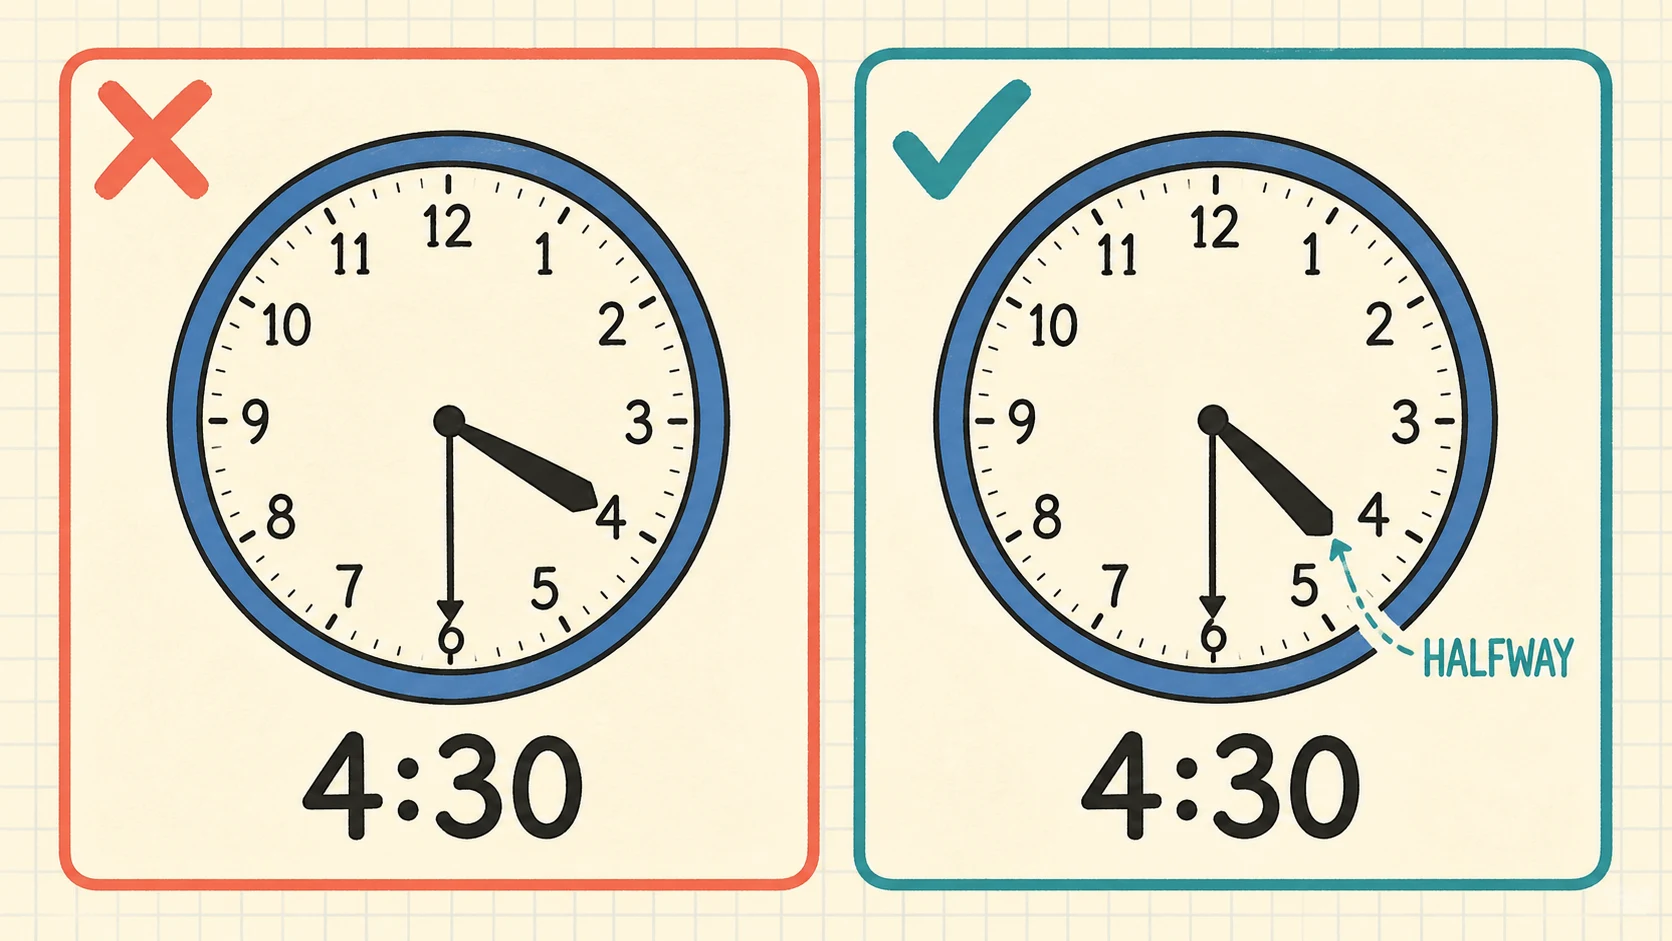
Reduce visual load, clarify the hands, or represent the interval while preserving the original skill.
The IES guide for assisting students struggling with mathematics offers high-level, evidence-based guidance for planning additional mathematics support. It is not an assessment of this worksheet and should not be used to diagnose a learner. An adult can use the general principle of responsive, explicit support while continuing to base decisions on the work actually observed.
Interpret errors before assigning more problems
An incorrect answer is useful only when the adult identifies what produced it. Record the learner’s first response before discussing the correction.
Reversed-hand errors
Suppose a clock shows 2:30, but the learner reports 6:10. That pattern may indicate that the learner treated the long hand at 6 as the hour and the short hand near 2 as a minute-counting position.
Return to the sequence “hour hand first, minute hand second.” Have the learner identify each hand without calculating the time, then reconstruct the answer.
Next-hour errors
Suppose the intended time is 3:30, but the learner writes 4:30 because the hour hand lies between 3 and 4. Ask:
- Has the hour hand reached 4?
- Which numeral has it already passed?
- Is the time still three-something?
This is a boundary issue. The learner needs to understand that the hour hand moves continuously and that the new hour is named only when it begins.
Minute-notation errors
A learner may say “half past seven” correctly but write 7:06 after seeing the minute hand on 6. The spoken time suggests conceptual understanding of half past; the written answer suggests confusion between a clock-face numeral and elapsed minutes.
Show that the numeral 6 marks the halfway position around the clock. For the half-hour format, the written minutes are 30, not 06.
Interval-direction errors
If a problem asks for a later time and the learner moves backward, verify the meaning of later before reteaching arithmetic. Draw a simple forward arrow from the starting time. The time calculation may be sound even though the direction word was misunderstood.
Recording errors
Distinguish a time-reading error from a copying error. A learner might correctly say 8:30 and then write 8:03. Ask the learner to read the written answer aloud and compare it with the original representation. That check may be enough to reveal the reversal.
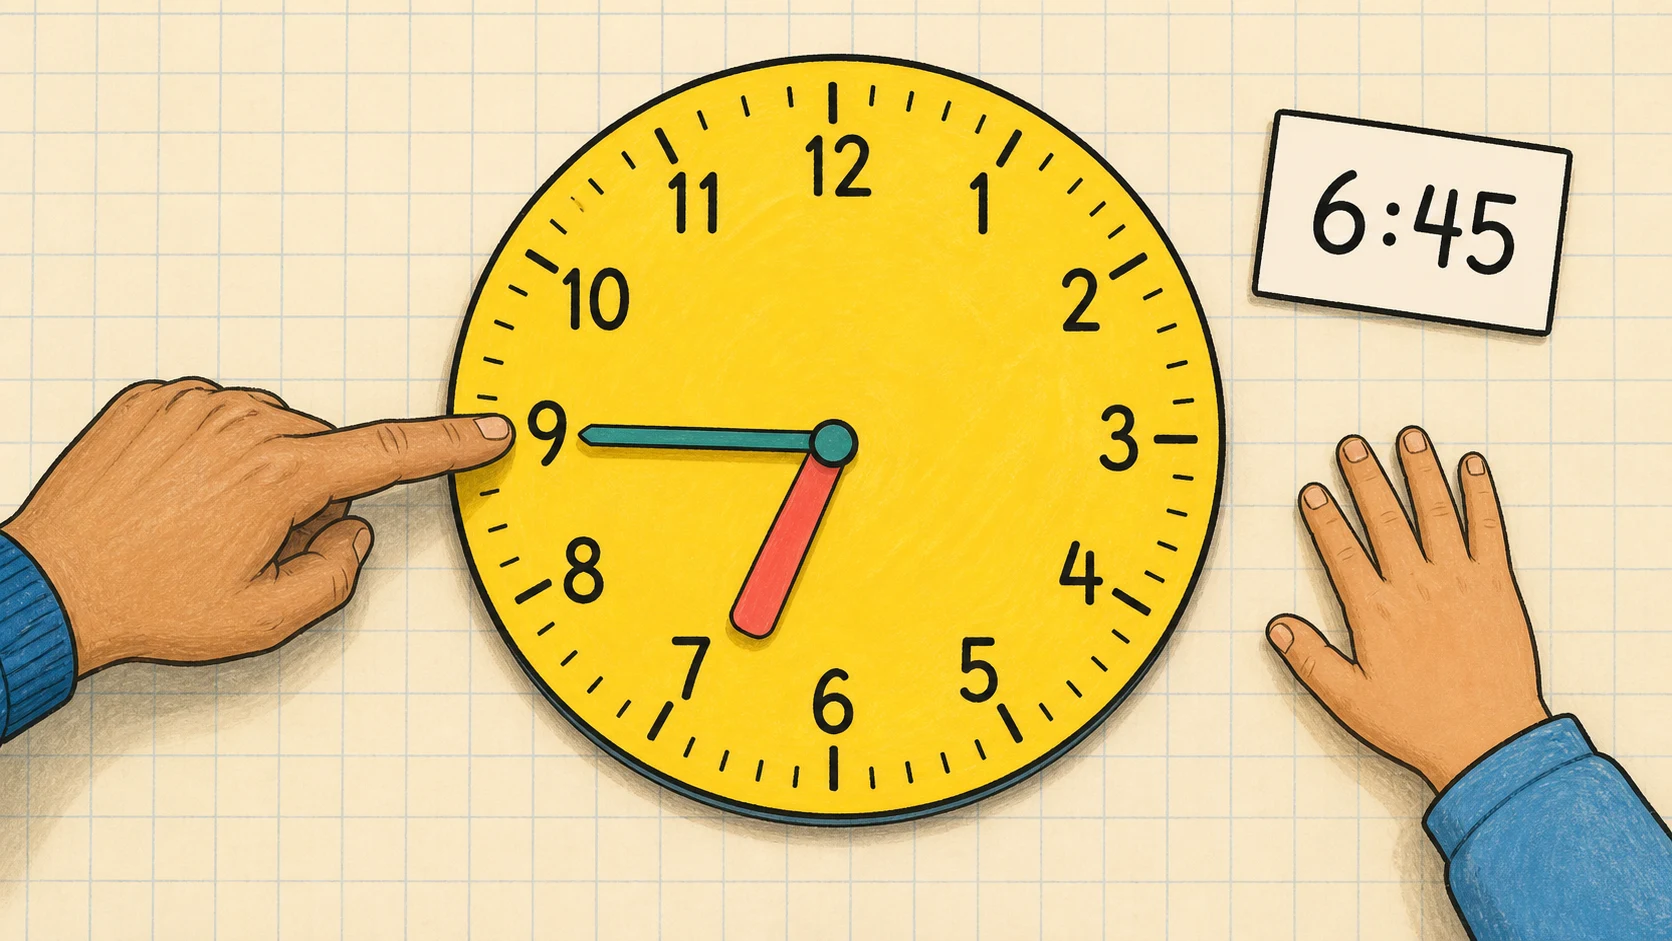
Preserve the first response, identify its cause, correct it, and test the correction on a new example.
Handle boundary cases carefully
Boundary cases reveal whether the learner understands the system rather than relying on a visual shortcut.
At 5:00, the minute hand is on 12 and the hour hand is on 5. At 5:30, the minute hand is on 6 and the hour hand is between 5 and 6. At 6:00, the minute hand returns to 12 and the hour hand reaches 6. These three times show how the hour hand advances while minutes accumulate.
An interval may also cross an hour boundary. Adding 30 minutes to 11:30 gives 12:00, not 11:60. This can be verified by splitting the hour into two 30-minute parts: the first half runs from 11:00 to 11:30, and the second runs from 11:30 to 12:00.
Do not introduce a.m., p.m., noon, or midnight unless the printed problem or current lesson requires those distinctions. A clock-face answer alone may not reveal the part of the day. Adding extra concepts during correction can obscure the specific skill being practiced.
First-grade catalogue expectations emphasize telling and writing time to the hour and half-hour. The Common Core mathematics standards likewise place hour and half-hour analog and digital time in Grade 1. However, local sequences differ, and the worksheet catalogue also identifies intervals, elapsed time, and various increments. Preview the actual page and treat any not-yet-taught form as material requiring instruction, not as proof that the learner is behind.
Check the answer key responsibly
The included key is a checking tool, not a substitute for examining the learner’s reasoning. Use it after the learner has attempted the selected items.
A dependable checking routine
For each response:
- Compare it with the corresponding answer-key entry.
- If it matches, ask for an explanation on one or two representative items.
- If it differs, return to the original problem before showing the key.
- Ask the learner to identify the hour, minutes, start time, or interval.
- Have the learner make a correction in a distinguishable way.
- Confirm the revised answer against both the problem and the key.
Adults should also check that the worksheet item and answer-key item numbers correspond. If a printed clock is unclear, verify it from the original PDF rather than relying on a reduced preview.
Do not convert one corrected answer into a claim that the skill is mastered. Conversely, do not treat one reversal or copying slip as evidence that the entire concept must be retaught. Look for patterns across comparable items.
A simple review record can use three labels:
- Independent: Correct without a prompt and supported by a clear method.
- Prompted: Correct after a question, visual cue, or representation.
- Not yet stable: Incorrect after support, guessed, or explained inconsistently.
These are instructional notes, not formal scores or diagnoses.
Decide what to do after the worksheet
The next step should follow the learner’s observed performance.
If most comparable items are solved independently and explained accurately, give a short delayed review rather than an immediate page of nearly identical work. If answers are accurate only with prompts, repeat a small number of similar problems while fading those prompts. If one problem type causes repeated errors, isolate that type for a focused model and guided practice.
If the learner struggles to distinguish the clock hands, return to reading whole-hour clocks before revisiting half-hours or intervals. If analog reading is secure but written notation is inconsistent, practice translating a few spoken times into digital form. If clock reading is secure but elapsed-time items are not, use a movable clock or forward jumps while retaining the same start times and intervals.
The 1st Grade math hub can help an adult place telling-time practice among other math work, while the 1st Grade worksheet hub provides the wider grade-level catalogue. These pages are navigation aids; they do not replace observation of the learner’s current understanding.
Schedule retrieval without overloading the learner
Retrieval means asking the learner to produce the method again after some time has passed. The purpose is to see whether the learning remains available without copying the completed page.
A practical, adjustable schedule is:
| Review point | Suggested task | What to observe |
|---|---|---|
| Later the same session | Revisit one corrected item without looking at the correction. | Can the learner explain the changed answer? |
| Next learning session | Solve two new, similar examples. | Is the routine available without immediate modeling? |
| Several days later | Mix one analog-reading item with one interval item already taught. | Can the learner select the appropriate method? |
| About a week later | Use a brief mixed review or another suitable printable. | Is performance still independent and accurate? |
This is an instructional suggestion, not a universal timetable. Shorten or lengthen the spacing according to the learner’s responses, the local schedule, and whether the material has been taught elsewhere.
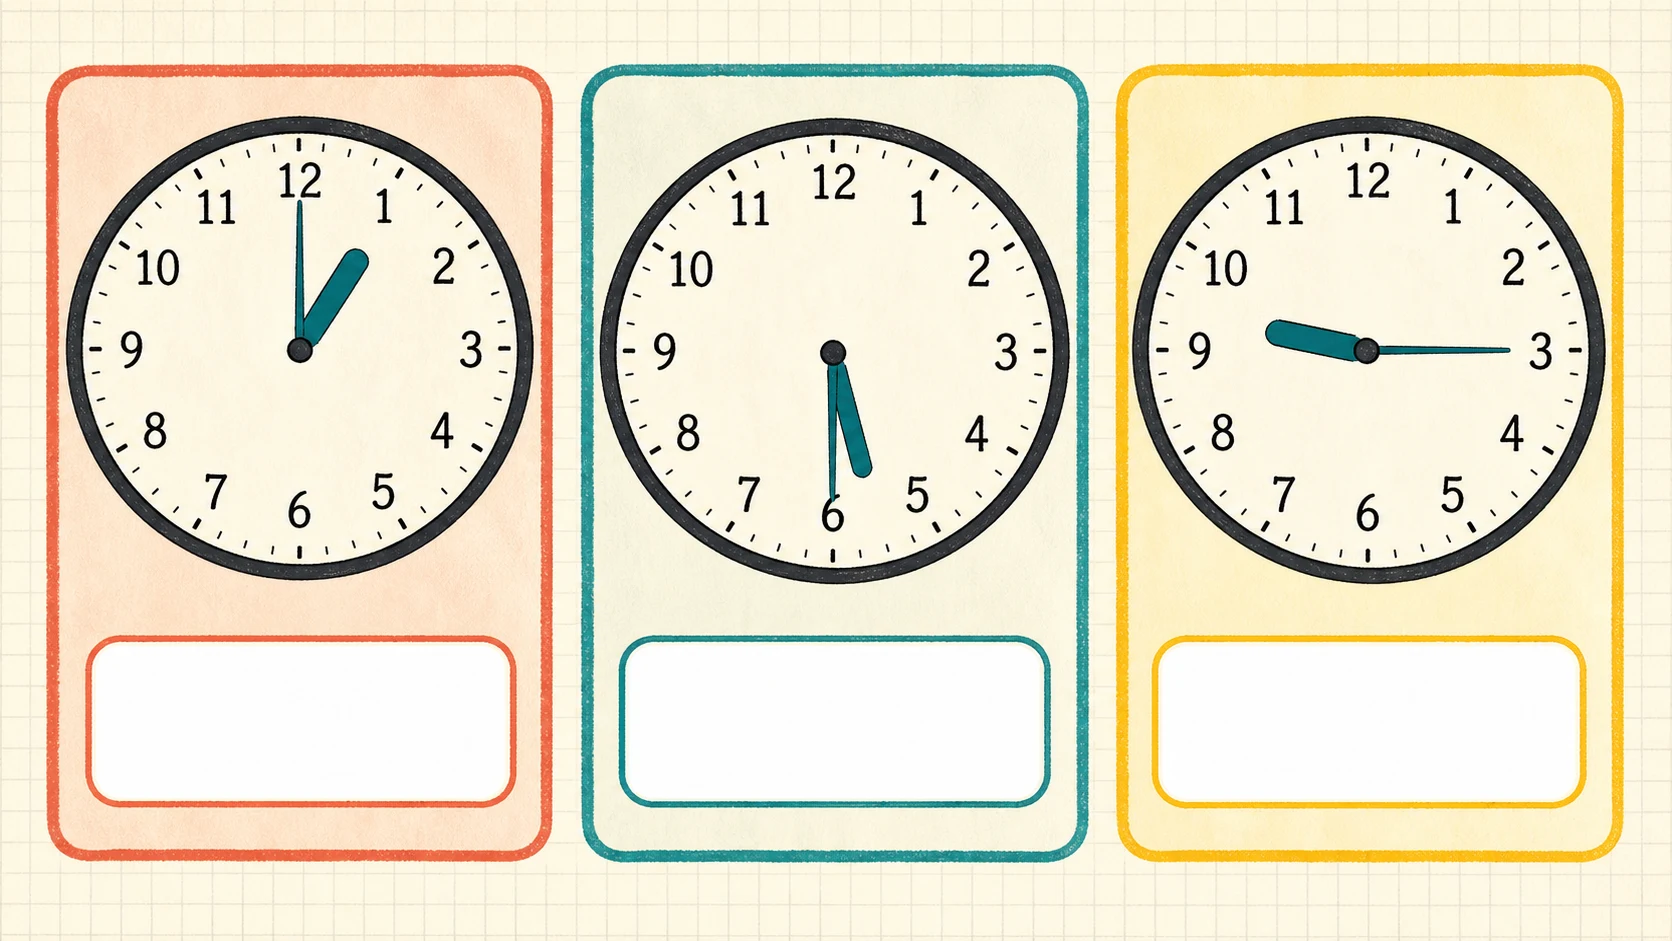
Revisit a few representative problems after increasing delays and adjust from the learner’s work.
Avoid asking the learner to memorize the positions of previously completed clocks. Change the displayed hour or starting time while keeping the same underlying structure. For example, after practicing 7:30, show 4:30 to check whether the learner understands the half-hour pattern.
What this printable can and cannot show
A 12-item worksheet can provide focused practice and reveal useful response patterns. It cannot, by itself, establish comprehensive mastery of telling time. The catalogue topic extends beyond early clock reading to finer increments, schedules, a.m. and p.m., conversions, and elapsed-time problems. This easy worksheet should not be treated as a complete topic assessment.
The page also cannot show every part of the learner’s thinking. An adult needs to listen to explanations, notice prompt dependence, and compare performance across representations. Accuracy on familiar-looking clocks may not transfer automatically to interval problems, and a notation mistake may conceal a correct spoken answer.
The worksheet is intended for first-grade practice, but a grade label is not individualized advice, certification, or a statement of comprehensive standards alignment. Use the label as a starting point, account for the learner’s taught curriculum, and let observed work determine pacing.
The honest next step
First, complete and review the free Standard Theme easy worksheet using the model-guide-release routine. Then use the telling-time topic guide to choose the next increment or problem type that matches the learner’s demonstrated readiness. If repeated practice across the topic is appropriate, the 1st Grade Telling Time Worksheet Pack contains 18 worksheets; for custom follow-up practice, explore the free worksheet generators.
Put it into practice
Use the guide with a real printable
Move from explanation to a short, observable practice task. Check the first item together, then adjust the next session from the learner's actual work.
See the 18-worksheet pack